Creating an own docker image is not very difficult - I mean it’s pretty well documented here. The challenges actually come when you want to create an image which is not just a simple example but something useful for your needs. Still mainly working at a company with Microsoft focus, I am currently helping a project to get it’s .Net and ASP application running in a container. For this I actually need a container with .Net as well as IIS with some extensions. As I did not find any image in DockerHub, I decided to create my own image. I could base it on amicrosoft/windowsservercore image or microsoft/dotnet-framework. I choose later and will install the necessary features via DSIM, the Deployment Image Servicing and Management tool.
Creating an image
So the first step is to create the Dockerfile, which in my case looks like this:
FROM microsoft/dotnet-framework
RUN DISM /Online /Enable-Feature /FeatureName:IIS-Webserver /all
RUN DISM /Online /Enable-Feature /FeatureName:IIS-NetFxExtensibility45 /all
RUN DISM /Online /Enable-Feature /FeatureName:IIS-ISAPIFilter /all
RUN DISM /Online /Enable-Feature /FeatureName:IIS-ASPNET45 /all
RUN DISM /Online /Enable-Feature /FeatureName:IIS-ASP /all
RUN DISM /Online /Enable-Feature /FeatureName:IIS-CGI /all
RUN DISM /Online /Enable-Feature /FeatureName:WCF-Services45 /all
RUN DISM /Online /Enable-Feature /FeatureName:WCF-HTTP-Activation45 /all
RUN DISM /Online /Enable-Feature /FeatureName:WCF-TCP-Activation45 /all
RUN DISM /Online /Enable-Feature /FeatureName:WCF-Pipe-Activation45 /all
RUN DISM /Online /Enable-Feature /FeatureName:WCF-MSMQ-Activation45 /all
RUN DISM /Online /Enable-Feature /FeatureName:WCF-TCP-PortSharing45 /all
Once created, I simply run docker build. Unfortunately in my case the building of the image struggled at the point when the feature “WCF-MSMQ-Activation45” should be installed:
PS C:\Users\Administrator\docker> docker build .
....
[===========================99.0%========================= ]
[==========================100.0%==========================]

Error: 0x800f0922

DISM failed. No operation was performed.
For more information, review the log file.

The DISM log file can be found at C:\Windows\Logs\DISM\dism.log
The command 'cmd /S /C

Activation45 /all' returned a non-zero code: 2
148469026
So what do now? The log file which I am supposed to consult is within the image, so how can access it. Well understanding the build process makes it obvious, simple run an interactive container with the image created so far…
PS C:\Users\Administrator\docker> docker images
REPOSITORY                    TAG                 IMAGE ID            CREATED             SIZE
<none>                        <none>              0a2e9989c51e        43 minutes ago      12 GB
microsoft/dotnet-framework    latest              4d83c32ad497        2 months ago        9.56 GB
microsoft/windowsservercore   latest              4d83c32ad497        2 months ago        9.56 GB
microsoft/nanoserver          latest              d9bccb9d4cac        2 months ago        925 MB
Now that we know the image - it currently has no name but only and image id - we can launch a container to examine the log file.
docker run -it --rm 0a2e9989c51e powershellIn order to continue I will simply remove the installation of “WCF-MSMQ-Activation45” feature for now, cause it seems a bit more tricky to solve and it may be actually even not required in the end to run the final application. After updating the Dockerfile, we simply call docker build again. This will not create all from scratch again but relies on the cached data so the build process actually continues where left off and install the missing features
PS C:\Users\Administrator.RDR-VM239185\docker> docker build .
Sending build context to Docker daemon  2.56 kB
Step 1/12 : FROM microsoft/dotnet-framework
 ---> 4d83c32ad497
Step 2/12 : RUN DISM /Online /Enable-Feature /FeatureName:IIS-Webserver /all
 ---> Using cache
 ---> b75747c14150
...

Step 12/12 : RUN DISM /Online /Enable-Feature /FeatureName:WCF-TCP-PortSharing45 /all
 ---> Running in 37d82dbe3cc6

Deployment Image Servicing and Management tool
Version: 10.0.14393.0
Use your image
Once your image is build, you can use it and run containers based on it. Keep in mind, the image is currently locally available only.
PS C:\Users\Administrator\docker> docker images
REPOSITORY                    TAG                 IMAGE ID            CREATED             SIZE
<none>                        <none>              0efd40aa1c2d        About an hour ago   12.7 GB
microsoft/dotnet-framework    latest              4d83c32ad497        2 months ago        9.56 GB
microsoft/windowsservercore   latest              4d83c32ad497        2 months ago        9.56 GB
microsoft/nanoserver          latest              d9bccb9d4cac        2 months ago        925 MB
As I did not provide any tag when calling docker build - i.e. use docker build -t - I would have to use the image ID. Therefore I will first tag the image appropriately - anyway something I need to do before pushing the image to the registry.
PS C:\Users\Administrator\docker> docker tag 0efd40aa1c2d papanito/windows-iis-asp:latest
PS C:\Users\Administrator\docker> docker images
REPOSITORY                    TAG                 IMAGE ID            CREATED             SIZE
papanito/windows-iis-asp      latest              0efd40aa1c2d        About an hour ago   12.7 GB
microsoft/dotnet-framework    latest              4d83c32ad497        2 months ago        9.56 GB
microsoft/windowsservercore   latest              4d83c32ad497        2 months ago        9.56 GB
microsoft/nanoserver          latest              d9bccb9d4cac        2 months ago        925 MB
So now I can simply start a container using my new image
docker run -it --rm papanito/windows-iis-asp powershellPublish and Image
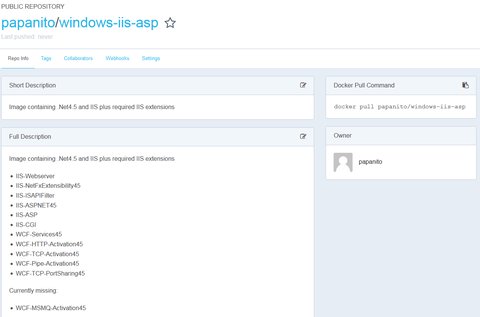
Once the image is created it would make sense to publish it to a registry - in this example I use Dockerhub. It is simple, just follow the steps describe in the Docker Wiki. First I have to create a repository:

After your repository is created - assuming you are already logged in to Dockerhub - simply push the image to the registry. As windows images are usually very big (see above) it may take some time:
PS C:\Users\Administrator\docker> docker push papanito/windows-iis-asp
The push refers to a repository [docker.io/papanito/windows-iis-asp]
c09d0056ccd3: Pushed
cc6e9267293f: Pushed
6fff9ddca60a: Pushed
43506122565b: Pushed
1d7c74c253e8: Pushed
a55c25b557e2: Pushed
7af6941b966a: Pushed
090ffccc3c5f: Pushed
1836c63cf79c: Pushed
2d2e76ead01f: Pushed
299bf4af20e2: Pushed
d8ae2ed89610: Pushed
1e9cc392d78e: Pushed
c28d44287ce5: Skipped foreign layer
f358be10862c: Skipped foreign layer
latest: digest: sha256:d6224a9ca6a1e888e474e38c9053362662573a4bbe51e21621264b369d243dda size: 3713
Once the image is uploaded to the registry it is ready to be used by others.

This is definitely not the final image as I still have to debug the failing installation of MSMQ and there my be other components required to get the final application running within a container. But with this image as a basis I actually save a lot of time to have my base container to work with.