Switching Static Website Generator
Posted on February 21, 2021 by Adrian Wyssmann ‐ 8 min read
Switching my website from Jekyll to Hugo and the reasons why

Why switching the website generator?
When I switched from Wordpress to Jekyll I was quite happy cause maintaining the site was much easier - cause everything is code. However, as I want to add more stuff than only blog posts including some non-english content, I tried adding multi-language support to my Jekyll-site, using jekyll-multiple-languages-plugin. As I was struggling to get it working quickly, I figured, maybe should sit down and see whether Jekyll is the right choice. back then I did not really look around, but just wanted to get rid of Wordpress. So this time let’s do some research.
Why Hugo
I eventually found https://jamstack.org/. As of today the page list 322 results, which is a lot of static website generator - too much to evaluate each one of them. So how to proceed then? Well obviously a good start is looking at the onces with most Github stars - apparently these frameworks seems very appealing to a lot of people.
Do be clear, mi intention is not to do a comparison of different frameworks as this would need a proper evaluation. I am just simply looking for something easy to use incl. multi-language support
Among the top project is not only Jekyll, but also others. So what I did is
- looked into the documentation and the showcases
- installed (some of) them and initialized a simple website
- made some modifications to see how difficult it is to understand syntax and make changes
As I am no web developer I usually rely on cool open-source themes and then do my modifications - which is by the way really nice to get to know details. During my “evaluation” I eventually found DOKS - an amazing theme. It`s made with Hugo.
Thanks
Kudos to the guys from [DOKS], their theme is amazing
So while looking at this theme and try to do modifications I really got fond of Hugo and here is why. Hugo …
… is incredibly fast to build a site - much faster than other tools
… in contrary to Jekyll - which relies on plugins to add features - Hugo has it all-in-one
Sure this means if you are missing a feature it cannot be added as you could do with Jekyll. BUt I am fine with that
… has multi-language built in
… knows Draft, Future, and Expired Content
In Jekyll posts need to follow the format 2017-01-02-my-first-post.md. When working on drafts in Jekyll, you can skip
yyyy-mm-dddprefix of your post so the posts do not appear in the page. This means every time you want to publish you have to rename the post. I like Hugo`s approach much better.… has an easy and powerful menu system
- Place content in one or many menus
- Handle nested menus with unlimited depth
- Create menu entries without being attached to any content
- Distinguish active element (and active branch)
… allows user-defined Taxonomies - I will show this below
… knows related content by default
… knows shortcodes, which are
snippets inside your content files calling built-in or custom templates
So how did I get started
As mentioned I started with DOKS and then modifying some things to my needs. Even so the documentation of Hugo is great I eventually had to reach out to the Community which is very cool and supportive.
Add a language switcher
First what I was missing is a language switcher, which allows me to switch the language if a translated page is available. So I added an language-switcher.html under layouts/partials/main which looks as follows:
<div class="dropdown nav-item">
    <span><a class="nav-link" href="#" ><svg xmlns="http://www.w2.org/2000/svg" viewBox="0 0 20 20" width="20" height="20" style="vertical-align: text-center; margin-right: 5px;"><path fill="currentColor" d="M19.753 10.909c-.624-1.707-2.366-2.726-4.661-2.726-.09 0-.176.002-.262.006l-.016-2.063 3.525-.607c.115-.019.133-.119.109-.231-.023-.111-.167-.883-.188-.976-.027-.131-.102-.127-.207-.109-.104.018-3.25.461-3.25.461l-.013-2.078c-.001-.125-.069-.158-.194-.156l-1.025.016c-.105.002-.164.049-.162.148l.033 2.307s-3.061.527-3.144.543c-.084.014-.17.053-.151.143.019.09.19 1.094.208 1.172.018.08.072.129.188.107l2.924-.504.035 2.018c-1.077.281-1.801.824-2.256 1.303-.768.807-1.207 1.887-1.207 2.963 0 1.586.971 2.529 2.328 2.695 3.162.387 5.119-3.06 5.769-4.715 1.097 1.506.256 4.354-2.094 5.98-.043.029-.098.129-.033.207l.619.756c.08.096.206.059.256.023 2.51-1.73 3.661-4.515 2.869-6.683zm-7.386 3.188c-.966-.121-.944-.914-.944-1.453 0-.773.327-1.58.876-2.156a3.21 3.21 0 011.229-.799l.082 4.277a2.773 2.773 0 01-1.243.131zm2.427-.553l.046-4.109c.084-.004.166-.01.252-.01.773 0 1.494.145 1.885.361.391.217-1.023 2.713-2.183 3.758zm-8.95-7.668a.196.196 0 00-.196-.145h-1.95a.194.194 0 00-.194.144L.008 16.916c-.017.051-.011.076.062.076h1.733c.075 0 .099-.023.114-.072l1.008-3.318h3.496l1.008 3.318c.016.049.039.072.113.072h1.734c.072 0 .078-.025.062-.076-.014-.05-3.083-9.741-3.494-11.04zm-2.618 6.318l1.447-5.25 1.447 5.25H3.226z"></path></svg>{{ .Language.LanguageName }}</a>
    <ul class="shadow">
        {{ range $.AllTranslations }}
        <li class="dropdown_link"><a href="{{ .RelPermalink }}" target="_self" rel="noopener noreferrer">{{ .Site.Language.Params.flag }} {{ .Language.LanguageName }}</a></li>
        {{ end }}
    </ul>
    </span>
</div>
Which then can be included in layouts/header/header.html as follows
...
      {{ if .Site.Params.showLanguageBar }}
      <div class="navbar-nav main-nav mr-auto order-8 order-md-3">
         {{ partial "main/language-switcher.html" . }}
      </div>
      {{ end -}
...
As you can see, the aperance is configurable by the parameter in the params.toml
...
showLanguageBar = true
...
Adding some custom css and you get this result:

Logo on the upper left
On the upper left I prefer to show the logo instead of site title. So I add the following parameters to params.toml
## Homepage
title = "Wyssmann Engineering"
titleShow = false
...

## Logo in the page header
logo = "logo_w_blue_64.png"
logoShow = true
logoSize = 45
showLanguageBar = true
....
Adding the following code to the layouts\header\header.html allows you to display yor site logo and/or text:
...
    {{ if .Site.Params.LogoShow -}}
    <a class="navbar-brand order-1 order-md-0 mr-auto" href="/">
      <image class="site-logo lazyload blur-up" src="/{{ .Site.Params.Logo }}" data-src="/{{ .Site.Params.Logo }}" width="{{ .Site.Params.LogoSize }}" height="{{ .Site.Params.LogoSize }}" alt="{{ .Site.Params.Title }}">
    </a>
    {{ end -}}
    {{ if .Site.Params.TitleShow -}}
    <a class="navbar-brand order-1 order-md-0 mr-auto" href="{{ .Site.BaseURL | absURL }}">{{ .Site.Params.Title }}</a>
    {{ end -}}
...
Contributors taxonomy
Taxonomies which are user-defined groupings of content. I want to show the author or contributor(s) of the blog post or page - at the moment this is usually only me but who knows what the future looks like.

First once has to specify the taxonomy in the config.toml
[taxonomies]
  contributor = "contributors"
  category = "categories"
  tag = "tags"
To show the information in the page, I made the following modifications to layouts/main/blog-meta.html:
<p><small>Posted {{ .PublishDate.Format "January 2, 2006" }} by {{ if .Params.contributors -}}{{ range $index, $contributor := .Params.contributors }}....Then one can define the parameter in the front matter:
| |
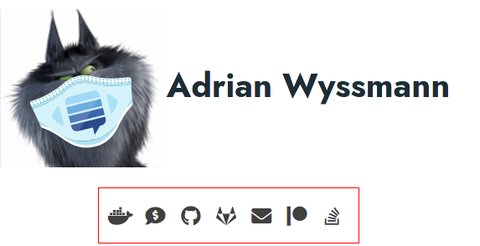
So that’s it, first thing accomplished. Now, when clicking on the contributor, one should see the details like social links etc.

For this to happen, I added a new data file data/social.yml
docker:
    name: Docker
    baseURL: 'https://hub.docker.com/u/'
    icon: 'fab fa-docker'
facebook:
    name: Facebook
    baseURL: 'https://www.facebook.com/'
    icon: 'fab fa-facebook'
github:
    name: GitHub
    baseURL: 'https://github.com/'
    icon: 'fab fa-github'
gitlab:
    name: GitLab
    baseURL: 'https://gitlab.com/'
    icon: 'fab fa-gitlab'
twitter:
    name: Twitter
    baseURL: 'https://twitter.com/'
    icon: 'fab fa-twitter'
reddit:
    name: Reddit
    baseURL: 'https://reddit.com/u/'
    icon: 'fab fa-reddit'
email:
    name: 'Email me'
    baseURL: 'mailto:'
    icon: 'fas fa-envelope'
mailhide:
    name: 'Email me'
    baseURL: 'https://mailhide.io/e/'
    icon: 'fas fa-envelope'
linkedin:
    name: LinkedIn
    baseURL: 'https://linkedin.com/in/'
    icon: 'fab fa-linkedin'
xing:
    name: Xing
    baseURL: 'https://www.xing.com/profile/'
    icon: 'fab fa-xing'
stackoverflow:
    name: StackOverflow
    baseURL: 'https://stackoverflow.com/users/'
    icon: 'fab fa-stack-overflow'
snapchat:
    name: Snapchat
    baseURL: 'https://www.snapchat.com/add/'
    icon: 'fab fa-snapchat-ghost'
instagram:
    name: Instagram
    baseURL: 'https://www.instagram.com/'
    icon: 'fab fa-instagram'
youtube:
    name: YouTube
    baseURL: 'https://www.youtube.com/'
    icon: 'fab fa-youtube'
spotify:
    name: Spotify
    baseURL: 'https://open.spotify.com/user/'
    icon: 'fab fa-spotify'
telephone:
    name: Phone
    baseURL: 'tel:'
    icon: 'fab fa-phone'
patreon:
    name: Patreon
    baseURL: 'https://patreon.com/'
    icon: 'fab fa-patreon'
flattr:
    name: Flattr
    baseURL: 'https://flattr.com/@'
    icon: 'fas fa-comment-dollar'
Then in the respective front matter of the page e.g content/en/contributors/adrian-wyssmann/index.md I then can add social parameters like this
---
title: "Adrian Wyssmann"
date: 2021-02-16T13:00:00+02:00
lastmod:  2021-02-16T13:00:00+01:0
draft: false
userimage: "papanito.png"
social:
  github: "papanito"
  gitlab: "papanito"
  docker: "papanito"
  #  reddit: "yourname"
  #  linkedin: "yourname"
  #  xing: "yourname"
  stackoverflow: "229864/papanito"
  #  snapchat: "papanito"
  #  instagram: "papanito"
  #  youtube: "user/yourname"
  #  telephone: +14159998888
  #  steam: "papanito"
  #  twitch: "yourname"
  #  yelp: "yourname"
  flattr: "papanito"
  patreon: "papanito"
---
So to use this, I create two partials. layouts/partials/main/social-icons.html which iterates over the list of social-parameters
<ul class="social navbar-nav social-nav order-3 order-md-5">
    {{ range $elementKey, $element := .Params.social }}
    {{ with index $.Site.Data.social $elementKey}}
    <li class="nav-item">
      {{ partial "main/social-icon.html" (dict "context" . "socialKey" $element ) }}
    </li>
    {{ end -}}
    {{ end -}}
</ul>
The above calls layouts/partials/main/social-icon.html, which then renders the icon using FontAwesome:
<a href="{{ .context.baseURL}}{{ $.socialKey }}" title="{{ .context.name }}">
<span class="fa-stack fa-lg" aria-hidden="true">
    <i class="{{ .context.icon }} fa-stack-1x"></i>
</span>
<span class="sr-only">{{ .context.name }}</span>
</a>
At last, the social-icons.html is called within contributors/list.html template as follows:
| |
Final words
By accomplishing small tasks to make my site look as I imagine helped me a lot to learn and really like Hugo.


I am sure one can do the same things with the other Jamstack tools as well. However, I made my choice to use Hugo for all the reasons I mentioned above.