Kubernetes is complex and at first overwhelming if you never did something with it. In this post I want to focus on a simple deployment and putting some pieces (Pod, Deployment, ConfigMap, Ingress) together to get a better understanding for newbies.
I assume you are already familiar with the Kubernetes Basics and you have setup your own cluster.
Deploy an nginx container
As a developer you usually have your own application you want to deploy. However, for this post I go a different approach which maybe also more understanding from the people coming from operations. Let’s assume we have a static website we want to deploy:
<!DOCTYPE html>
<html>
<head>
<title>nginx-demo</title>
<style>
    body {
    width: 35em;
    margin: 0 auto;
    font-family: Tahoma, Verdana, Arial, sans-serif;
    background
    }
</style>
</head>
<body>
<center>
<h1>Welcome to nginx-demo!</h1>
<p><image src="data:image/png;base64,iVBORw0KG......=" alt="my logo"/></p>
<p>Yeah it worked, you successfully deployed an nginx with a custom website.</p>
</center>
</body>
</html>
For this you need something which can serve the website, so we could use an nginx and deploy it as follows:
apiVersion: apps/v1
kind: Deployment
metadata:
  name: nginx-demo
  namespace: nginx-demo
  labels:
    app: nginx-demo
spec:
  replicas: 1
  selector:
    matchLabels:
      app: nginx-demo
  template:
    metadata:
      labels:
        app: nginx-demo
    spec:
      containers:
      - name: nginx
        image: nginx:latest
        imagePullPolicy: IfNotPresent
        ports:
        - containerPort: 80
This will deploy a single nginx pod:
$ kubectl create ns nginx-demo
$ kubectl apply -f ./nginx-demo.yaml
$ kubectl get pod -n nginx-demo
NAME                          READY   STATUS    RESTARTS   AGE
nginx-demo-6dddfb4b45-pvc4k   1/1     Running   0          106s
You can then access the website using kubectl proxy to forward port 80 of the pod to port 5000 of your localhost:
$ kubectl port-forward $(kubectl get pod -n nginx-demo -o name --no-headers=true) -n nginx-demo 5000:80
Forwarding from 127.0.0.1:5000 -> 80
Forwarding from [::1]:5000 -> 80
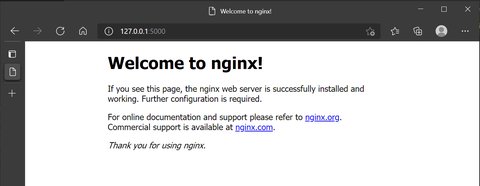
Then in your browser you can access the port via https://localhost:5000, which serves the default nginx welcome page:

Use a ConfigMap to map your custom page
As next, you want to show the page mentioned above, rather than the default one. Here is where you can use a ConfigMap. The ConfigMap defines a file index.html with some custom HTML:
apiVersion: v1
kind: ConfigMap
metadata:
  name: nginx-demo-indexhtml
  namespace: nginx-demo
data:
   index.html: |
      <!DOCTYPE html>
      <html>
      <head>
      <title>nginx-demo</title>
      <style>
         body {
            width: 35em;
            margin: 0 auto;
            font-family: Tahoma, Verdana, Arial, sans-serif;
            background
         }
      </style>
      </head>
      <body>
      <center>
      <h1>Welcome to nginx-demo!</h1>
      <p><image src="data:image/png;base64,iVBORw0KG......=" alt="my logo"/></p>
      <p>Yeah it worked, you successfully deployed an nginx with a custom website.</p>
      </center>
      </body>
      </html>
The index.html from the ConfigMap shall replace the default /usr/share/nginx/html/index.html within the container. This is done by mapping it into the container, by extending the nginx-demo.yaml with volumeMounts and volumes, telling kubernetes to map the file from withom zhe ConfigMap to the desired path in the pod:
apiVersion: apps/v1
kind: Deployment
metadata:
  name: nginx-demo
  namespace: nginx-demo
  labels:
    app: nginx-demo
spec:
  replicas: 1
  selector:
    matchLabels:
      app: nginx-demo
  template:
    metadata:
      labels:
        app: nginx-demo
    spec:
      containers:
      - name: nginx
        image: nginx:latest
        imagePullPolicy: IfNotPresent
        ports:
        - containerPort: 80
        volumeMounts:
        - mountPath: /usr/share/nginx/html/index.html
          name: nginx-indexhtml-vol
          subPath: index.html
      volumes:
      - ConfigMap:
          defaultMode: 420
          items:
          - key: index.html
            path: index.html
          name: nginx-demo-indexhtml
        name: nginx-indexhtml-vol
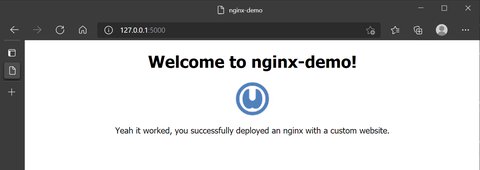
This will restart the pod and then you issue again the same kubectl proxy command as above:
$ kubectl port-forward $(kubectl get pod -n nginx-demo -o name --no-headers=true) -n nginx-demo 5000:80
Forwarding from 127.0.0.1:5000 -> 80
Forwarding from [::1]:5000 -> 80
This should give you an idea of what a ConfigMap offers
Ingress
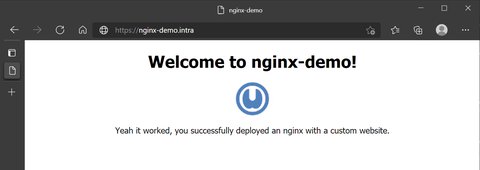
kubectl proxy works ok but it’s not how we want to access our website, we prefer something like https://nginx-demo.intra, Thus we need two things
expose the application as a network service
kind: Service
apiVersion: v1
metadata:
name: nginx-demo-service
namespace: nginx-demo
spec:
selector:
   app: nginx-demo
ports:
   - port: 80 # Default port for image
an Ingress which exposes HTTP and HTTPS routes from outside the cluster to services
You must have an Ingress controller to satisfy an Ingress. Only creating an Ingress resource has no effect.See Ingress controller for details. This is the configuration required:
apiVersion: extensions/v1beta1
kind: Ingress
metadata:
name: nginx-demo-ingress
namespace: nginx-demo
annotations:
   ingress.kubernetes.io/rewrite-target: /
spec:
rules:
- host: "nginx-demo.intra"
   http:
      paths:
      - path: /
         backend:
            serviceName: nginx-demo-service
            servicePort: 80

That’s it, we deployed a custom static website using a ConfigMap via an Ingress. As a next step it might be worth to look at Ingress controller, specifically also Bare-metal considerations in case you run your cluster on bare metal.