Network simulation with GNS3 and CML
Posted on September 26, 2021 by Adrian Wyssmann ‐ 6 min read
As I am currently working on refreshing my networking skills and as I want to get deeper into network security, I was looking for some courses. As part of this research, I stumbled over GNS3 and CLM, both tools to create virtual lab environments.
Actually, I was not aware of either GNS3 nor CLM until I started the course Linux for Network Engineers: Practical Linux with GNS3, one which was offered for free by David Bombal. If you don’t know David Bombal, I recommend to have a look at his Youtube Channel, where he discusses Python, Ethical Hacking, Networking, Network Automation, CCNA and Virtualization. So this course focuses on GNS3 but also mentions CLM.
GNS3
What is GNS3
GNS3 is an open source network emulator
GNS3 allows you to run a small topology consisting of only a few devices on your laptop, to those that have many devices hosted on multiple servers or even hosted in the cloud.
GNS3 consists of 2 components, the client or the graphical user interface (GUI) and the server to which the client connects to. The server components is the one which contains all the necessary software components to do simulation and emulation of devices, as described in the docu:
- Emulation: GNS3 mimics or emulates the hardware of a device and you run actual images on the virtual device. For example, you could copy the Cisco IOS from a real, physical Cisco router and run that on a virtual, emulated Cisco router in GNS3.
- Simulation: GNS3 simulates the features and functionality of a device such as a switch. You are not running actual operating systems (such as Cisco IOS), but rather, a simulated device developed by GNS3, like the built-in layer 2 switch.
So if you want to start with GNS3 you need to install at least the GUI locally. Even so the installation instructions are for Debian- and Ubuntu-based distributions, you can easily install it for Archlinux using AUR:
paru -S gns3-uiThe server component itself, can be run in 3 different “modes”
Local GNS3 Server
If you want to run the server locally, then you also have to install the GNS3-server…
paru -S gns3-server… plus additional components which are required for emulation/simulation like VPCS - a PC simulator which allows you to simulate a lightweight PC supporting DHCP and ping - or dynamips - program to emulate Cisco routers. Both are available from the AUR. However, vpcs is marked as outdated:
paru -S dynamips vpcs`You may also need to install additional components as mentioned in the installation instructions. At last ensure, your user belongs to the following groups (usermod -a -G GROUPNAME LOGIN):
ubridge libvirt kvm wireshark dockerCheckout other installation instructions for windows and mac.
Local GNS3 VM
If you cannot or don’t want to install the GNS3-server on your local machine, you can also use a VM. I recommend to download the pre-defined vm from Github. GNS3 supports the VirtualBox and VMWare, however they recommend VMWare Workstation Pro over VirtualBox, which usually costs money.
As I prefer working with qemu, I will go for the next option.
Remote GNS3 VM
Using a [remote machine][Remote GNS3 VM] as a server gives you the possibility to have more resources. Your remote server may be
- your own server
- a bare metal hosting provider like packet
- a cloud provider
Your “own” server can also be a vm which is running in esxi or as in my case in qemu. As projects are stored on the remote server, this is a good way to share scenarios.
Usage
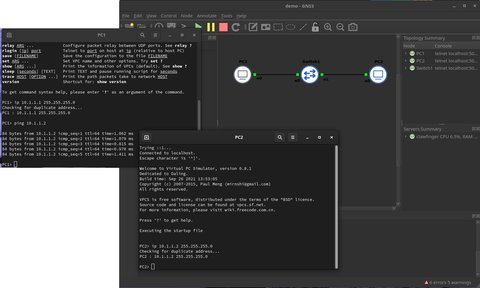
The user documentation is quite good and I created a small example with two PC’s and a switch in between. After giving each of the machines an ip - 192.168.1.x/24 - I could successfully execute a ping from both machines:

Sure this is just a simple demo, and there is much more possibilities - for sure you can create much more complex scenarios. But let’s speak first about appliances.
Appliances
As part of your lab, you already have some generic network components available. In addition you might use [ðocker] or use vm’s instead vpcs, to add more complex servers. Then there is the Marketplace, which offers a lot pre-configured appliances which can be imported, which includes a bunch of Cisco devices. However, you have to be aware that the Cisco appliances require you to pay a subscription at Cisco in order to be able to download the necessary images. Such a subscription costs around 200$ a year, which may not be affordable for all. So now what?
Cisco Modeling Labs (CLM)
So if you are relying on network equipment from Cisco you might find the Cisco Modeling Labs (CLM) interesting. This is an offer from Cisco DevNet which allows you to create lab environments similar to GNS3. There are some limitations with the personal edition:
- you have to reserve a slot in advanced to access the lab
- the session is limited to 4 hours max
- it only offers Cisco network appliances
Access
First you have to create a free account on the Cisco DevNet. Once this is done, as mentioned above, you have to register for a free slot of the CLM.
Go to the Sandbox and select Cisco Modeling Lab
On the top-right you click Reserve to reserve a slot for your lab
The slot may or may not be granted, depending on the available resources
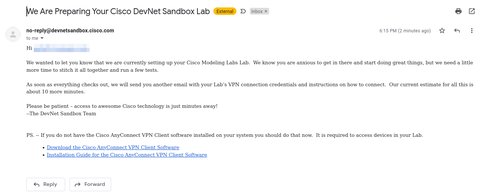
Once the sandbox is being prepared, you will get an initial e-mail:

To be able to access the sandbox, you need to use a VPN connection. So Windows and Mac users may have to download the AnyConnect VPN client.
The preparation will take up to 10 minutes. Once the sandbox is ready, you will get another mail with instructions to connect to it, using the VPN.
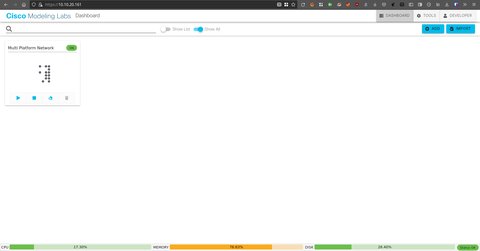
Once you login and connect the vpn, you can access the sandbox:

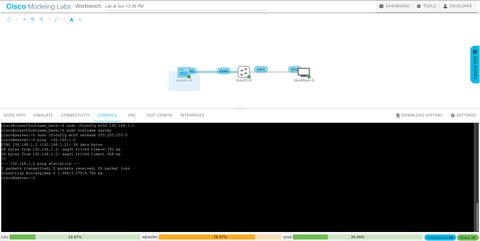
I decided to create an empty project and make a similar setup as I had on GNS3. The approach is similar: You add the components, draw connections between them and then configure the machines. Once this is done, we can ping each other again:

PacketTracer
By the way, there would also be a third option, the Cisco Packet Tracer. It a network simulator for CCNATM and CCNPTM certification exam. However, to be able to download, you required an account at the Cisco Network Academy, which apparently you get when you attend a course of one of the academies.
Conclusion
Setting up a network lab with real devices is expensive and definitively not possible for everyone. Simulators are a good and cheap alternative and with GNS3 and CLM you have some options at hand, which appear to work nicely and offer a lot of possibilities.

