Terraform and Hetzner Cloud
Posted on May 6, 2022 by Adrian Wyssmann ‐ 8 min read
While I had already looked into Terraform in the past, I am actually pretty new to it, and just started now to take a better look at it and working with it. In my last post, I had a look on the concept of Terraform. Today I will start using it, to setup a simple environment on Hetzner Cloud.
Initializing and provider setup
As a first we need a provider, obviously in this case the hcloud provider. As instructed in the documentation you add the following to your project, by adding a .tf-file, usually it’s called provider.tf - the filename really does not matter, as terraform will merge all .tf-files together:
terraform {
  required_providers {
    hcloud = {
      source = "hetznercloud/hcloud"
      version = "1.33.1"
    }
  }
}

provider "hcloud" {
  # Configuration options
}
Then you run terraform init
Initializing the backend...

Initializing provider plugins...
- Finding hetznercloud/hcloud versions matching "1.33.1"...
- Installing hetznercloud/hcloud v1.33.1...
- Installed hetznercloud/hcloud v1.33.1 (signed by a HashiCorp partner, key ID 5219EACB3A77198B)

Partner and community providers are signed by their developers.
If you'd like to know more about provider signing, you can read about it here:
https://www.terraform.io/docs/cli/plugins/signing.html

Terraform has created a lock file .terraform.lock.hcl to record the provider
selections it made above. Include this file in your version control repository
so that Terraform can guarantee to make the same selections by default when
you run "terraform init" in the future.

Terraform has been successfully initialized!

You may now begin working with Terraform. Try running "terraform plan" to see
any changes that are required for your infrastructure. All Terraform commands
should now work.

If you ever set or change modules or backend configuration for Terraform,
rerun this command to reinitialize your working directory. If you forget, other
commands will detect it and remind you to do so if necessary.
This will download the required files to .terraform/providers/ or in this case .terraform/providers/registry.terraform.io/hetznercloud/hcloud/1.33.1/linux_amd64/terraform-provider-hcloud_v1.33.1.
However, what we are missing is the “permissions” to access the hcloud. As documented this can be configured as follows
token- (Required, string) This is the Hetzner Cloud API Token, can also be specified with theHCLOUD_TOKENenvironment variable.
So you can extend provider.tf for instance as follows
....
# Configure the Hetzner Cloud Provider
provider "hcloud" {
  token = var.hcloud_token
}
The token then goes into a .tfvars-file or you can even specify it as cli parameter like -var="hcloud_token=...".
As token is sensitive, you should declare it as sensitive, which prevents Terraform from showing its value in the plan or apply output. Ultimately my provider.tf looks like this:
terraform {
  required_providers {
    hcloud = {
      source = "hetznercloud/hcloud"
      version = "1.33.1"
    }
  }
}

variable "hcloud_token" {
  sensitive = true # Requires terraform >= 0.14
}

provider "hcloud" {
  token = var.hcloud_token
}
Create a server
To create a server we follow the documentation and create a .tf-file - e.g. example.tf - which contains the specification:
# Create a new server running debian
resource "hcloud_server" "node1" {
  name        = "node1"
  image       = "ubuntu-22.04"
  server_type = "cx11"
}
Now you can run a terraform plan, which shows you what terraform will create
$ terraform plan -var="hcloud_token=$HCLOUD_TOKEN_DEV"

Terraform used the selected providers to generate the following execution plan. Resource actions are indicated with the following symbols:
  + create

Terraform will perform the following actions:

  # hcloud_server.node1 will be created
  + resource "hcloud_server" "node1" {
      + backup_window              = (known after apply)
      + backups                    = false
      + datacenter                 = (known after apply)
      + delete_protection          = false
      + firewall_ids               = (known after apply)
      + id                         = (known after apply)
      + ignore_remote_firewall_ids = false
      + image                      = "ubuntu-22.04"
      + ipv4_address               = (known after apply)
      + ipv6_address               = (known after apply)
      + ipv6_network               = (known after apply)
      + keep_disk                  = false
      + location                   = (known after apply)
      + name                       = "node1"
      + rebuild_protection         = false
      + server_type                = "cx11"
      + status                     = (known after apply)
    }

Plan: 1 to add, 0 to change, 0 to destroy.
If you are fine with that, run tf apply, which shows you the same info as above. Once you approve by typing yes, terraform will create the resources
terraform apply -var="hcloud_token=$HCLOUD_TOKEN_DEV"
...
Plan: 1 to add, 0 to change, 0 to destroy.

Do you want to perform these actions?
  Terraform will perform the actions described above.
  Only 'yes' will be accepted to approve.

  Enter a value: yes

hcloud_server.node1: Creating...
hcloud_server.node1: Still creating... [10s elapsed]
hcloud_server.node1: Creation complete after 10s [id=20229296]

Apply complete! Resources: 1 added, 0 changed, 0 destroyed.
If you go to your hcloud web ui, you can find the server created:

Make changes
Let’s adjust the name of the server in example.tf, plus we add some labels:
resource "hcloud_server" "node1" {
  name        = "tf-test-node"
  image       = "ubuntu-22.04"
  labels = {
    type = "tf"
  }
  server_type = "cx11"
}
Now, running terraform plan will tell you what it will change. Certain changes are “in-place”
$  terraform plan -var="hcloud_token=$HCLOUD_TOKEN_DEV"
hcloud_server.node1: Refreshing state... [id=20229296]

Note: Objects have changed outside of Terraform

Terraform detected the following changes made outside of Terraform since the last "terraform apply":

  # hcloud_server.node1 has changed
  ~ resource "hcloud_server" "node1" {
        id                         = "20229296"
      + labels                     = {}
        name                       = "node1"
        # (14 unchanged attributes hidden)
    }


Unless you have made equivalent changes to your configuration, or ignored the relevant attributes using ignore_changes, the following plan may include actions to
undo or respond to these changes.

─────────────────────────────────────────────────────────────────────────────────────────────────────────────────────────────────────────────────────────────────────

Terraform used the selected providers to generate the following execution plan. Resource actions are indicated with the following symbols:
  ~ update in-place

Terraform will perform the following actions:

  # hcloud_server.node1 will be updated in-place
  ~ resource "hcloud_server" "node1" {
        id                         = "20229296"
      ~ labels                     = {
          + "type" = "tf"
        }
      ~ name                       = "node1" -> "tf-test-node"
        # (14 unchanged attributes hidden)
    }

Plan: 0 to add, 1 to change, 0 to destroy.
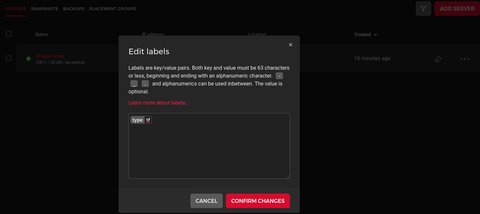
After running terraform apply we can observe, that the node name has changed and the server also has the specific label associated


The terraform state
Let’s have a quick look at the terraform.tfstate file. This currently looks like this
cat ./terraform.tfstate
{
  "version": 4,
  "terraform_version": "1.1.8",
  "serial": 5,
  "lineage": "4ba3562b-3369-4bd3-7260-a83a39569b18",
  "outputs": {},
  "resources": [
    {
      "mode": "managed",
      "type": "hcloud_server",
      "name": "node1",
      "provider": "provider[\"registry.terraform.io/hetznercloud/hcloud\"]",
      "instances": [
        {
          "schema_version": 0,
          "attributes": {
            "backup_window": "",
            "backups": false,
            "datacenter": "hel1-dc2",
            "delete_protection": false,
            "firewall_ids": [],
            "id": "20229296",
            "ignore_remote_firewall_ids": false,
            "image": "ubuntu-22.04",
            "ipv4_address": "95.216.207.169",
            "ipv6_address": "2a01:4f9:c012:543d::1",
            "ipv6_network": "2a01:4f9:c012:543d::/64",
            "iso": null,
            "keep_disk": false,
            "labels": {
              "type": "tf"
            },
            "location": "hel1",
            "name": "tf-test-node",
            "network": [],
            "placement_group_id": null,
            "rebuild_protection": false,
            "rescue": null,
            "server_type": "cx11",
            "ssh_keys": null,
            "status": "running",
            "timeouts": null,
            "user_data": null
          },
          "sensitive_attributes": [],
          "private": "XXXXXXXX"
        }
      ]
    }
  ]
}
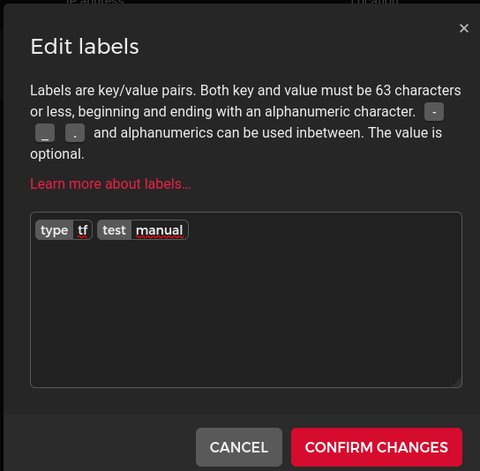
What happens if we do some manual changes on the server, e.g. by manually adding a label in the UI

If you run terraform plan, it detects the changes, and will tell you that this label will be removed, while terraform apply will definitively remove it:
$ terraform plan -var="hcloud_token=$HCLOUD_TOKEN_DEV"
...
  # hcloud_server.node1 will be updated in-place
  ~ resource "hcloud_server" "node1" {
        id                         = "20229296"
      ~ labels                     = {
          - "test" = "manual" -> null
            # (1 unchanged element hidden)
        }
        name                       = "tf-test-node"
        # (14 unchanged attributes hidden)
    }
...
Terraform destory
If you don’t need your stuff anymore, you just can run terraform destory which ultimately will delete all resources you manage with terraform.
terraform destroy  -var="hcloud_token=$HCLOUD_TOKEN_DEV"
hcloud_server.node1: Refreshing state... [id=20229296]

Terraform used the selected providers to generate the following execution plan. Resource actions are indicated with the following symbols:
  - destroy

Terraform will perform the following actions:

  # hcloud_server.node1 will be destroyed
  - resource "hcloud_server" "node1" {
      - backups                    = false -> null
      - datacenter                 = "hel1-dc2" -> null
      - delete_protection          = false -> null
      - firewall_ids               = [] -> null
      - id                         = "20229296" -> null
      - ignore_remote_firewall_ids = false -> null
      - image                      = "ubuntu-22.04" -> null
      - ipv4_address               = "95.216.207.169" -> null
      - ipv6_address               = "2a01:4f9:c012:543d::1" -> null
      - ipv6_network               = "2a01:4f9:c012:543d::/64" -> null
      - keep_disk                  = false -> null
      - labels                     = {
          - "type" = "tf"
        } -> null
      - location                   = "hel1" -> null
      - name                       = "tf-test-node" -> null
      - rebuild_protection         = false -> null
      - server_type                = "cx11" -> null
      - status                     = "running" -> null
    }

Plan: 0 to add, 0 to change, 1 to destroy.

Do you really want to destroy all resources?
  Terraform will destroy all your managed infrastructure, as shown above.
  There is no undo. Only 'yes' will be accepted to confirm.

  Enter a value: yes

hcloud_server.node1: Destroying... [id=20229296]
hcloud_server.node1: Destruction complete after 1s

Destroy complete! Resources: 1 destroyed.
Having done, that I can visually confirm that this has happened:

A look at the terraform.tfstate also shows, that nothing is managed anymore with terraform
 cat ./terraform.tfstate
{
  "version": 4,
  "terraform_version": "1.1.8",
  "serial": 7,
  "lineage": "4ba3562b-3369-4bd3-7260-a83a39569b18",
  "outputs": {},
  "resources": []
}
Summary and next steps
This was a basic example on how to create, manage and destroy resources in [hecloud] using terraform. Obviously there are much complexer environments to manage, than a single server. Also interesting is, how to start managing resources, which you previously managed manually. I will cover that in one of my next posts.